Form & Technique
Diamond Pushups for Beginners: Form & Progressions
Discover diamond pushups for beginners with step-by-step form cues, benefits, and beginner-friendly progressions you can do anywhere.
Diamond push-ups for beginners: form fundamentals and hand placement
Hand placement and wrist alignment
- Form a small diamond with thumbs and index fingers under your chest.
- Keep hands close to center so wrists stay stacked under shoulders.
- Maintain a neutral wrist; avoid bending backward or collapsing.
- Elbows hug your sides to protect the shoulders.
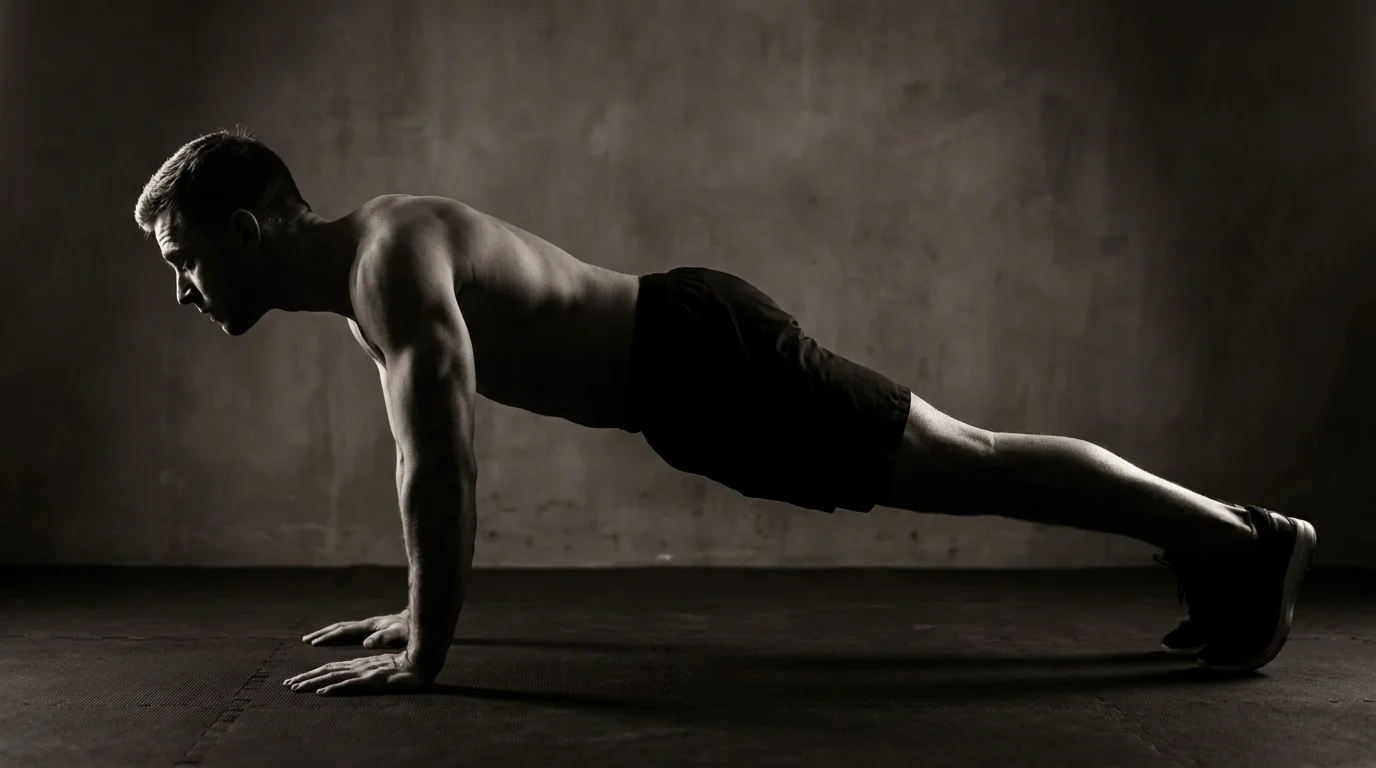
Plank position, setup, and depth
- If you’re learning how to do a diamond push-up, start in a high plank with the diamond hand position.
- Keep a neutral spine—ribs over hips, feet hip-width apart; this supports consistent diamond push-up form.
- Lower slowly until your chest nears the floor or elbows reach about 90 degrees.
- Hold hips steady; avoid sagging or piking.
Tempo cues and control
- Descent 2-3 seconds; press back up 1-2 seconds.
- Exhale on the push, inhale on the way down.
Common mistakes and fixes
- Elbows flare outward; draw them toward your ribs.
- Shoulders hike toward ears; glide them down and back.
- Hips drift; keep your body in a straight line.
- If full depth hurts, regress to wall push-ups until form improves.
Injury-safe warm-up and mobility prerequisites
- Do light wrist circles and shoulder openers before your set.
- Finish with a quick chest opener to prep thoracic mobility.
Progressions, regressions, and comparing diamond to regular push-ups
Regression ladder: wall to incline to kneeling
- Wall push-ups: stand close to a wall, hands at chest height. Use a slow 3-second descent, 1-second pause, 1-second press. Aim for 8–12 reps with solid alignment.
- Incline push-ups: hands on a sturdy surface (table/bench). Same 3-1-1 tempo, ribcage tucked, core tight.
- Kneeling push-ups: hands on floor, knees down, hips in line with shoulders. Maintain tempo and control; progress when you can complete sets with good form.
Tempo and control cues
- Keep a tall spine, elbows about 45 degrees, chin neutral. Exhale on the push, inhale on the way down. If tempo slips, regress first.
Diamond vs regular push-up: muscle emphasis and safety
- Diamond push-ups emphasize triceps and inner chest more; standard push-ups target the chest with broader shoulder engagement. Diamond can be tougher on wrists—watch form and back off if needed.
Hand placement and wrist alignment reminders
- Hands form a diamond under the chest; wrists stacked under shoulders. If wrists bother you, switch to fists or push-up bars.
Bonus variations: triangle push-up and close-grip push-up
- Triangle push-up: hands close to form a small triangle; elbows tuck in.
- Close-grip push-up: hands under chest, closer than standard; scale with incline if needed.
4-week progressive plan: frequency, reps, and workouts for beginners
Week-by-week overview
- Week 1 (2 days): wall diamond push-ups, 3 sets of 6–8. Rest 60–90 seconds. No equipment needed.
- Week 2 (2 days): knee diamond push-ups, 3 sets of 6–9. Rest 60–90 seconds.
- Week 3 (2–3 days): incline diamond push-ups on a sturdy surface, 3 sets of 5–8. Rest 60–90 seconds.
- Week 4 (2–3 days): floor regular push-ups, 3 sets of 4–6. Rest 60–90 seconds. Progress toward standard push-ups.
Sample workouts (2–3 days/week)
- Week 1: Day A and B — wall diamond push-ups 3x6–8; 2 sets of 10–15s scapular resets.
- Week 2: 2 days — knee diamond push-ups 3x6–9; add 2x10s planks.
- Week 3: 3 days — incline diamond push-ups 3x5–8; optional 2x6 regular push-ups with knees down.
- Week 4: 3 days — standard push-ups 3x4–6; use incline if needed to finish.
Progression criteria and deloads
Move to Week 4 when you can hit the top end with control for two sessions. If form breaks, repeat Week 3 or insert a 1-week deload (2 days with easier variations).
Mobility and shoulder health prerequisites
Do 5 minutes pre-activation: thoracic rotations, wall slides, and gentle wrist circles.
Video/graphic form checklist and common mistakes to avoid
Keep hands in a diamond under chest, elbows ~45°, glutes and core braced, hips in line with shoulders. Avoid sagging hips, flaring elbows, or head jutting forward; breathe steadily, lower with control, and reach full extension.
Frequently asked questions
What is a diamond push-up and how is it different from a regular push-up?
Diamond push-ups place the hands close together to form a diamond under the chest, emphasizing the triceps and inner chest. They differ from regular push-ups, which use a wider hand position and target the chest more, but can be tougher on the wrists if form isn’t kept.
Can beginners do diamond push-ups, and how should they progress?
Yes. Start with wall or high-incline diamond push-ups, then move to incline, kneeling, and finally full floor diamond push-ups. Follow a four-week plan: Week 1 2–3 sets of 4–6 reps, Week 2 6–8 reps, Week 3 three sets of 8–10 reps, Week 4 six to 12 reps.
What are the benefits of diamond push-ups for the triceps?
Diamond push-ups increase emphasis on the triceps and inner chest due to the close hand position, while still training the chest and shoulders when performed with proper form.
How do you form a proper diamond push-up (hand placement, elbow position)?
Form a small diamond with thumbs and index fingers under the chest, wrists stacked under the shoulders, and elbows hugging your sides at about 40–45 degrees. Keep a straight line from head to heels, brace your core, and keep shoulders down away from the ears.
About the authors

Goran Huskić
Co-founder · Professional basketball player
Goran Huskić is a Serbian professional basketball player — a 6'11" center currently playing for Monbus Obradoiro in Spain's Primera FEB. He won the 2019–20 Basketball Champions League with San Pablo Burgos and has competed professionally across Spain, Germany, Lithuania, Serbia and the United States. He co-founded PUSHapp to bring pro-level training discipline to everyday workouts.

Nikola Janković
Co-founder · Former professional basketball player
Nikola Janković is a former professional basketball player — a 6'9" forward and the 2016–17 ABA League MVP — who played for Partizan, Union Olimpija and Mega, among others. Today he runs a pilates studio and gym focused on strength, mobility and overall wellbeing. He co-founded PUSHapp to make consistent, measurable training simple for everyone.