
Comparisons
Incline Pushups vs Regular Pushups: Compare & Progress
Compare incline pushups vs regular pushups, when to use each, proper form, and progression tips to move toward a full push-up.


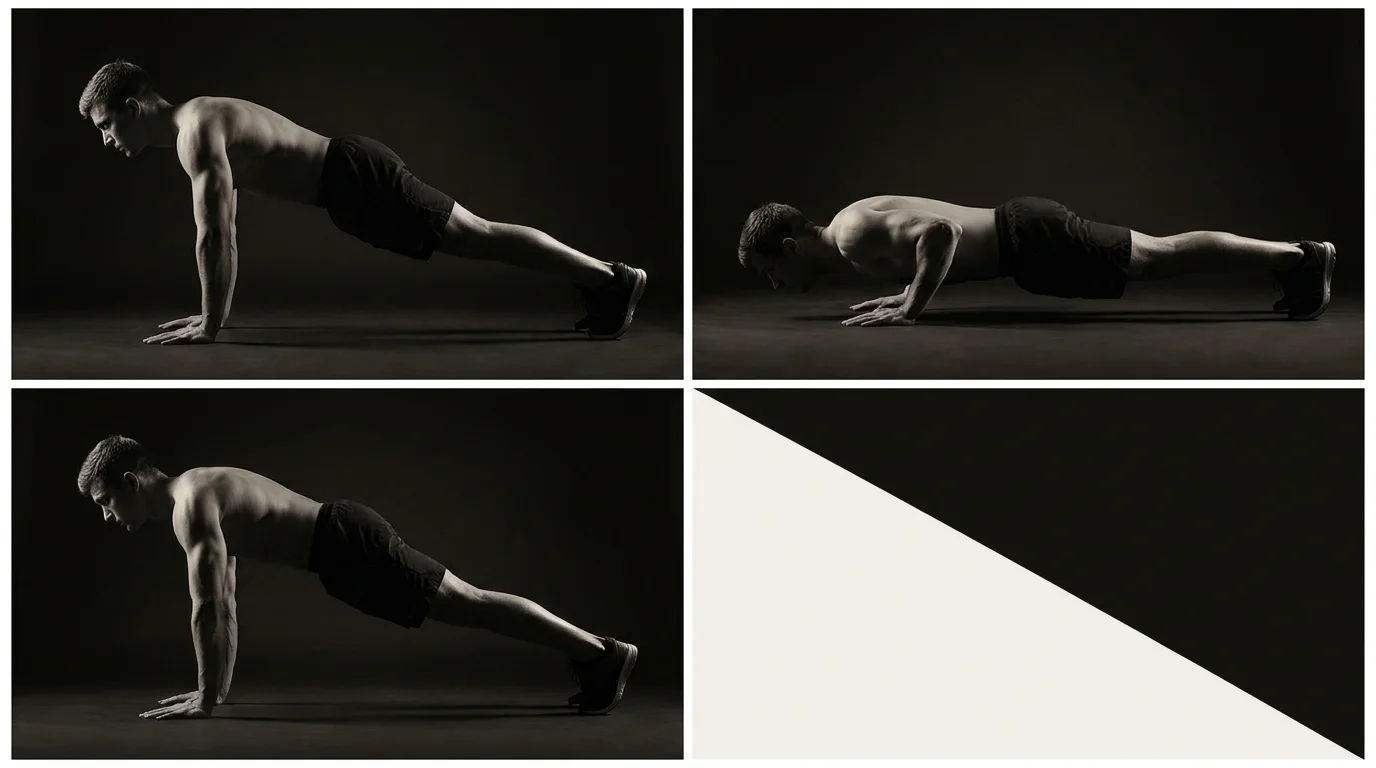
Understanding Incline Pushups vs Regular Pushups: Biomechanics, Benefits, and Use Cases
Biomechanics: how incline height changes load
- A higher incline (hands on a wall or bench) reduces the resisted load; gravity still acts, but you’re pressing a larger fraction of your body weight with help from the surface.
- Move the surface closer to the floor, and the load climbs toward a regular push-up.
Joint angles and range of motion
- With a higher incline, elbows bend through a shorter range and the torso stays more upright.
- A floor push-up bends the elbows deeper, demanding more core bracing.
Muscle activation: which muscles are emphasized
- Both lift your chest, shoulders, and arms, plus core stability.
- Incline push-ups tend to emphasize the shoulders and upper chest more; regular push-ups recruit the chest and triceps more evenly.
Practical use cases: when to choose incline vs regular (and wall push-ups as a beginner option)
- Start with wall push-ups or a high incline to learn form.
- Progress to lower inclines, then a full regular push-up on the floor as you gain strength.
- What is the difference between incline pushups and regular pushups? The incline version is easier, with a lighter load and a shorter ROM; the regular push-up is harder and uses more chest and core engagement.
Form, Safety, and Progression: From Incline Pushups to a Full Push-Up
Standard form cues for incline pushups at various heights
- Stand tall, feet stable, hands on an incline (wall, table, bench) slightly wider than shoulder width.
- Squeeze core and glutes, keep a neutral spine, and tuck the chin softly.
- Elbows track at about 45 degrees; don’t flare or lock at the top.
- Lower with control until your chest nears the surface; hips stay in line with shoulders.
- Press back up, exhale through the push, and reset before the next rep.
- Hand position can vary: try a slightly closer or wider stance, or rotate wrists a bit to reduce wrist strain.
Tempo and progression schemes
- Use a controlled tempo: 2 seconds down, 0 pause, 2 seconds up (2-0-2). Slow this if needed.
- Progress by height (wall to lower incline) and by adding reps before depth.
Programming: 4-week paths with reps/sets and rest
- Week 1: 3x8–10 on wall or high incline, 60–90s rest.
- Week 2: 3x10–12 on mid incline, 60–90s rest.
- Week 3: 3x8–10 on lower incline, 60–90s rest.
- Week 4: 3x6–8 incline at low height plus 2–4 negative/push-up attempts toward the floor; 90s rest.
Safety, modifications, and rehab-friendly options
- If pain or pinching appears, back off height or ROM and use wall push-ups.
- Use wall, table, or bench variations as needed; wrist-friendly hand positions or push-up handles can help.
- Include knee push-ups or wall-assisted reps when moving toward a full push-up.
Beyond Incline: Variants, Comparisons, and Crafting a Personal Progression Plan
How incline height and hand position affect muscle emphasis
- Higher incline (hands on a higher surface) is easier and shifts effort toward shoulders and triceps; chest involvement drops.
- Lower incline (hands closer to floor) increases chest demand, especially the lower chest, with greater ROM.
- Hand width changes emphasis: wide targets the chest more; diamond narrows to triceps; regular/shoulder-width sits between.
Variant-by-variant quick guide: wide, pike, diamond, decline
- Wide push-up: hands wider than shoulders; broad chest engagement.
- Pike push-up: hips high; emphasizes deltoids and upper chest.
- Diamond push-up: hands close under sternum; strong triceps and inner chest emphasis.
- Decline push-up: feet elevated; upper chest and front shoulders loaded.
Progression strategy: when to switch from incline to decline or to a full push-up
- Start with incline to build strength. When form holds for 12–15 reps, try a regular push-up; progress to decline or add a variant (wide/diamond) to increase load.
Practical plan: sample progression templates and goals
- Starter: 3×8 incline on a bench, 2–3 days/wk for 4 weeks.
- Transition: 3×8 regular push-ups, then 3×6–12 decline or pike/diamond as needed.
Frequently asked questions
What is an incline push-up and how does it differ from a regular push-up?
An incline push-up has your hands on an elevated surface (wall, table, bench), which reduces the load and shortens the range of motion. A regular push-up is performed on the floor with a longer range of motion and typically greater chest and core engagement.
When should I start with incline push-ups vs. regular push-ups as a beginner?
Begin with high incline or wall push-ups to learn form and build basic strength. As you gain strength, move to lower inclines and only switch to full floor push-ups when you can maintain a neutral spine, braced core, and controlled tempo.
How should I choose the incline height (bench level) for incline push-ups?
Choose a height that lets you maintain proper form—the torso stays upright, elbows around 45 degrees, and you can control the descent. Start high (wall or tall bench) and progressively lower the surface as you can perform reps with good tempo and no pain.
How do I progress from incline push-ups to full push-ups?
Progress gradually with tempo and depth: use a 2-0-2 tempo, move from higher to lower inclines, and add controlled negatives toward the floor as you improve until you can perform a full push-up with a braced core.
About the authors

Goran Huskić
Co-founder · Professional basketball player
Goran Huskić is a Serbian professional basketball player — a 6'11" center currently playing for Monbus Obradoiro in Spain's Primera FEB. He won the 2019–20 Basketball Champions League with San Pablo Burgos and has competed professionally across Spain, Germany, Lithuania, Serbia and the United States. He co-founded PUSHapp to bring pro-level training discipline to everyday workouts.
Nikola Janković
Co-founder · Former professional basketball player
Nikola Janković is a former professional basketball player — a 6'9" forward and the 2016–17 ABA League MVP — who played for Partizan, Union Olimpija and Mega, among others. Today he runs a pilates studio and gym focused on strength, mobility and overall wellbeing. He co-founded PUSHapp to make consistent, measurable training simple for everyone.