Form & Technique
How to Do Fingertip Pushups: Step-by-Step Guide
Learn how to do fingertip pushups with proper form, safety tips, and progressive steps to build grip and forearm strength.
Mastering Finger- and Wrist-Safe Fingertip Pushups: Form, Hand Placement, and Safety
Starting hand setup: finger spread and contact points
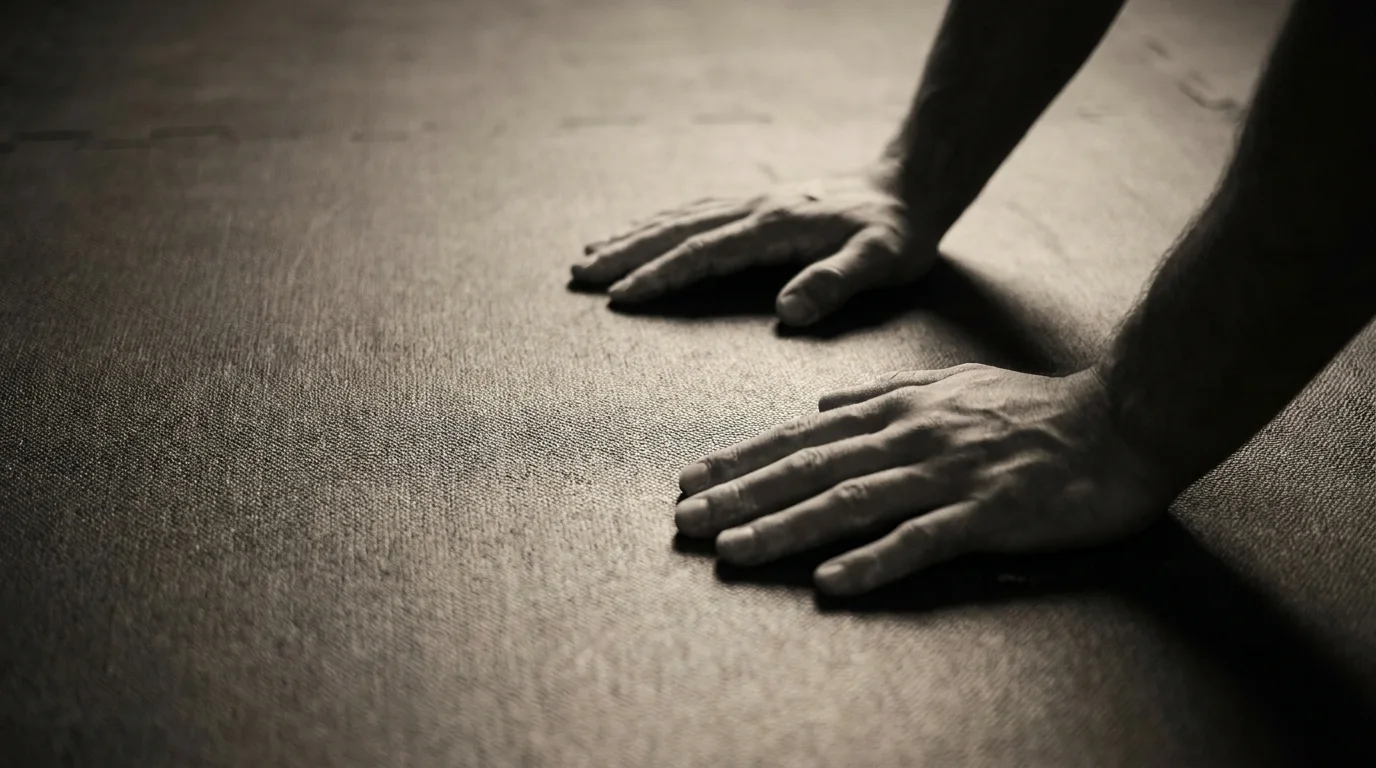
- For how to do fingertip pushups, place the fingertips on the ground with a light spread to create a stable base.
- Load through the very tips and the first joints, not the flat pads, to protect the finger joints.
- Let the thumbs rest lightly along the side for stability; avoid gripping tightly.
Thumb position and wrist alignment
- Keep wrists in a neutral line with your forearms; don’t let them bow or hyperextend.
- Imagine a straight line from elbow through the wrist. If that alignment hurts, regress to a flatter pushup or incline.
Initial safety checks and medical clearance
- Check for pain, numbness, or swelling before you start; stop if symptoms appear.
- If you have finger, hand, or wrist injuries, or any medical concerns, seek medical clearance before fingertip pushups.
Warm-up and finger/wrist mobility
- Do 30–60 seconds of finger extensions, gentle squeezes, and wrist circles to prep the joints.
Common beginner mistakes and quick fixes
- Wrist sag or uneven load: adjust hand width or switch to a softer surface.
- Overgripping or slipping: relax the grip and widen finger spread slightly.
Structured Progression: A Week-by-Week Plan to Build Fingertip Strength
Quick-start option: 2-week intro
- 3–4 workouts per week; start on an elevated surface to protect wrists.
- Do 4 sets of 3–5 reps with fingertips, 60–75 seconds rest.
- Gradually lower the elevation and add 1 rep each week if form stays solid.
- This quick-start primes your fingertip pushups progression without overload.
Week-by-week milestones (Weeks 1–4)
- Week 1: 4x3–5 on a raised surface; 60–90 seconds rest.
- Week 2: 4x4–6; inch toward the floor if you can keep solid form.
- Week 3: 4x5–7; mix floor reps with occasional elevated sets as needed.
- Week 4: 4x6–8 on the floor; aim for clean reps and steady grip.
Rest and recovery guidelines
- Rest 60–90 seconds between sets; use at least 48 hours between fingertip sessions.
- Warm up wrists and forearms; stop if sharp pain appears.
Home-friendly variations and equipment substitutions
- Use a kitchen counter, chair edge, or sofa arm to raise fingertips.
- Try a towel under fingertips for grip; ensure a stable, non-slip surface.
- Forearm-friendly drills: light wrist circles and finger stretches between sets.
When to advance: signs of readiness and red flags
- Readiness: consistent 4x6–8 on a stable surface with good form.
- Red flags: pain, numbness, or swelling; reduce volume or revert to higher elevation.
Mastery in Motion: Execution Details, Core Alignment, and Common Mistakes
Master fingertip work with a clear path: ribcage control, hip stability, and a deliberate breath. Use a video guide or mirror to refine your alignment, then layer in tempo and grip. Here’s how to do fingertip pushups step by step without guesswork.
Full-body alignment: ribcage, hips, and spine
- Brace the core; keep ribs knit to pelvis and hips level with shoulders.
- Maintain a neutral spine from crown to heels.
- Look a few feet ahead to protect your neck.
Finger contact points and grip mechanics
- Balance on the pads of fingertips; spread fingers for a stable base.
- Thumb positioning supports the grip without jamming the wrist.
- Elbows tuck slightly and forearms stay vertical for efficient leverage.
Breathing, tempo, and progression cues
- Inhale to lower with control; exhale to press up.
- Use a steady, moderate tempo and pause briefly at the bottom if needed.
- Progress from pushups on fingertips to full-floor pushups as you gain forearm strength; add sets gradually.
Common mistakes and fixes: sagging hips, wrist bending, mis-spread fingers
- Sagging hips? Breathe, brace, and tighten glutes to level the torso.
- Wrist bending? Keep wrists neutral; shorten the range if needed.
- Fingers not spread? Re-distribute weight across the fingertips.
Home-friendly demonstrations and progress-tracking
- Use a wall mirror or a phone video guide to verify thumb and finger positioning.
- Record side views to monitor ribcage control and hip stability; track reps and depth.
From quick-start to full-program: how to apply the plan
- Start with pushups on fingertips on a raised surface; progress as grip and core hold improve.
- Move toward lower surfaces and increased reps following a gentle weekly progression.
- Refer to a structured plan to maintain fingertip pushups safety and steady gains.
Frequently asked questions
How do you perform fingertip pushups correctly?
Begin on an elevated surface if needed. Place the fingertips on the ground with a light spread and load through the tips; keep wrists neutral and elbows close to your sides. Brace your core and breathe—inhale on the way down, exhale as you press up—then move to lower surfaces as your form stays solid.
Are fingertip pushups safe for beginners?
Yes, when started with a progression and warm-up. Stop if you feel sharp pain, numbness, or swelling; if you have finger, hand, or wrist injuries, seek medical clearance before starting.
How can I progress to fingertip pushups if I can't do them yet?
Start with incline fingertip pushups on a bench to protect your wrists, then gradually lower the surface as your form stays solid. Progress to floor reps when you can maintain good technique, aiming for 4x3-5 reps and adding reps weekly. Rest 60–90 seconds between sets.
Do you need any equipment to do fingertip pushups?
No special equipment is required; you can start on a kitchen counter, chair edge, or sofa arm, and you can place a towel under the fingertips for grip on a stable surface.
About the authors

Goran Huskić
Co-founder · Professional basketball player
Goran Huskić is a Serbian professional basketball player — a 6'11" center currently playing for Monbus Obradoiro in Spain's Primera FEB. He won the 2019–20 Basketball Champions League with San Pablo Burgos and has competed professionally across Spain, Germany, Lithuania, Serbia and the United States. He co-founded PUSHapp to bring pro-level training discipline to everyday workouts.
Nikola Janković
Co-founder · Former professional basketball player
Nikola Janković is a former professional basketball player — a 6'9" forward and the 2016–17 ABA League MVP — who played for Partizan, Union Olimpija and Mega, among others. Today he runs a pilates studio and gym focused on strength, mobility and overall wellbeing. He co-founded PUSHapp to make consistent, measurable training simple for everyone.