
Form & Technique
How to Do Archer Pushups: Step-by-Step Form
Learn how to do archer pushups with proper form, progressions toward one-arm push-ups, and common mistakes to avoid.

Prerequisites, readiness tests, and loading targets for archer push-ups
Prerequisites: strength and mobility benchmarks
- You should be able to perform 6-8 strict floor push-ups with good form, hips and spine aligned.
- Shoulder mobility should allow comfortable overhead reaching and external rotation without pain.
- A 30 second front plank with minimal wobble signals solid core and hip control.
Readiness tests and tolerances
- Test 1: Push-up tolerance. Do 6-8 reps with clean form and no shoulder pain. If form breaks or pain appears, pause and rebuild base first.
- Test 2: Stability check. Hold a top push-up position for 15-20 seconds on each side with solid trunk control. If you cant hold without hips sagging or twisting, work on stability before progressing.
- Tolerances: Gentle soreness after training is fine if it resolves quickly; sharp pain or pinching means stop and reassess.
Measuring load distribution on the working arm
- Use two bathroom scales placed under each hand in a controlled top position.
- Run a 5- to 8-second controlled press and read both numbers.
- Target the working arm to carry about 70-80 percent of total bodyweight; the non-working arm should carry the rest.
- If the ratio is off by more than a few percent, adjust hand position or incline.
Starter variations for limited equipment
- Elevate the non-working arm on a bench to reduce load, then progressively lower the bench to increase demand toward the 70-80 percent target.
- Try archer push-ups from knees to build unilateral pressing strength without full bodyweight.
Technique, form cues, and core stability for archer push-ups
Setup
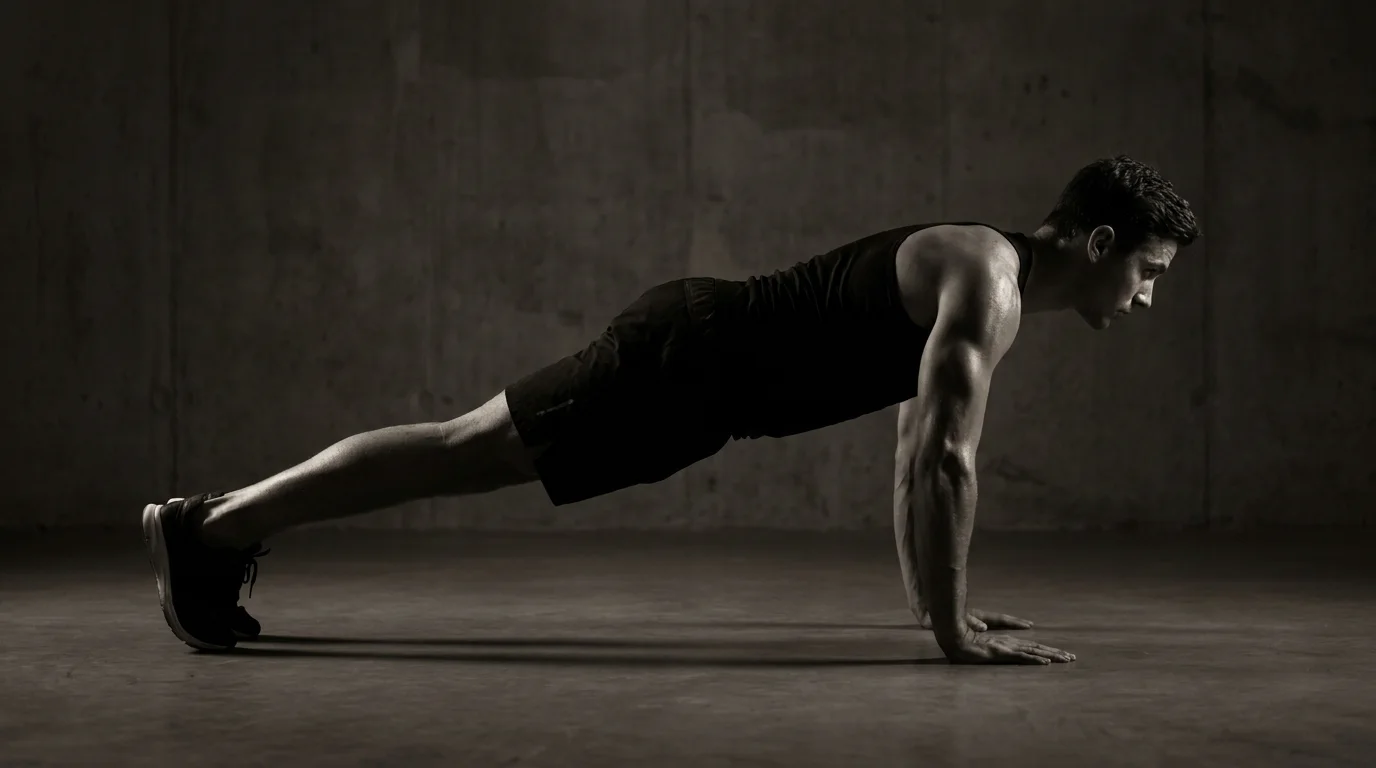
- Place the working hand under the shoulder and the other arm extended out to the side.
- Brace the core, keep a long spine, and look slightly ahead.
Position and full-body alignment
- Hips stay level, ribs down, and feet grounded.
- The working arm bends to lower the chest while the extended arm stays straight and the shoulder remains healthy.
Cues for perfect archer form
- Elbow position: keep the bent elbow tucked toward the ribcage, not flaring outward.
- Shoulder alignment: press the shoulder blades down and back, avoid letting the opposite shoulder rise.
- Core stability during archer push-ups: brace the belly and glutes to prevent rotation.
Integrated anti-rotation core drills
- Pallof press with a light band or cable.
- Side plank with controlled torso bracing.
Common mistakes and how to fix them
- Elbow flare causing shoulder strain. Fix by guiding the elbow in toward the body.
- Hips sagging or twisting. Fix with a strong glute brace and neutral spine.
- Head drifting upward. Fix by keeping a neutral gaze.
Home setup modifications and equipment tips
- Start with a bench or table incline, then progress to floor.
- Use a light resistance band or towel for grip and balance. Progress to floor reps only after you can keep form in a controlled 3 sets of 5 on incline.
Progression, 4-week plan, and transition toward one-arm push-ups
4-week archer push-up progression template
- Week 1: 3 sets per side, 4 to 6 reps per side; tempo 3 0 2; rest 60 to 90 seconds.
- Week 2: 3 to 4 sets per side, 5 to 7 reps per side; tempo 2 0 2; rest 75 to 90 seconds.
- Week 3: 4 sets per side, 6 to 8 reps per side; tempo 2 0 2; rest 90 seconds.
- Week 4: 4 sets per side, 8 to 10 reps per side; tempo 2 0 2; rest 90 to 120 seconds.
How many archer push-ups per session ranges from about 12 to 18 reps in week 1 to 32 to 40 reps per side by week 4. Use these targets as loose guidance and adjust to your current capacity.
Managing load: reps, tempo, and rest
- Prioritize form over pace. Keep core braced and hips level.
- If a rep feels sloppy, cut the set short and reset.
- Use minimal ROM reductions or incline variants to stay in control.
From archer to one-arm push-up: safe loading and cues
- Move gradually from fuller archer reps to shorter ranges and isometrics before attempting a one-arm push-up.
- Cue the stance to stay squared, ribs braced, and the resting arm tucked or lightly extended for balance.
Warm-up, mobility, and recovery for archer push-ups
- Dynamic shoulder bands or light towel pull aparts, arm circles, thoracic rotations.
- Doorway chest stretch 20 to 30 seconds per side, cat-cow and thoracic foam rolling as needed.
- Finish with 5 minutes of gentle mobility work and a short cooldown.
Minimal equipment modifications and home options
- No equipment needed for the base pattern; use a countertop or bench to modify.
- To progress, add a heavier resistance band across the chest or perform from a higher incline.
- Track progress in a simple log and aim to hit the Week 4 target per side.
Frequently asked questions
How do you perform an Archer push-up step by step?
Set up with the working hand under the shoulder and the other arm extended to the side. Brace the core, keep a long spine, and look slightly ahead. Lower by bending the working elbow while the extended arm stays straight and the hips stay level, then press back up while keeping the shoulders stable.
What is the typical loading distribution in an Archer push-up (percent on working arm)?
Target the working arm to carry about 70-80 percent of total bodyweight; the non-working arm carries the rest.
What prerequisites do you need before attempting Archer push-ups?
You should be able to perform 6-8 strict floor push-ups with good form, have shoulder mobility for overhead reaching and external rotation, and hold a 30 second front plank with minimal wobble.
How does training Archer push-ups help progression to a one-arm push-up?
The plan is a four-week progression that moves you toward a one-arm push-up with clear milestones you can test. Week 1 uses four sets of three to five clean reps with light loading.
About the authors
Goran Huskić
Co-founder · Professional basketball player
Goran Huskić is a Serbian professional basketball player — a 6'11" center currently playing for Monbus Obradoiro in Spain's Primera FEB. He won the 2019–20 Basketball Champions League with San Pablo Burgos and has competed professionally across Spain, Germany, Lithuania, Serbia and the United States. He co-founded PUSHapp to bring pro-level training discipline to everyday workouts.
Nikola Janković
Co-founder · Former professional basketball player
Nikola Janković is a former professional basketball player — a 6'9" forward and the 2016–17 ABA League MVP — who played for Partizan, Union Olimpija and Mega, among others. Today he runs a pilates studio and gym focused on strength, mobility and overall wellbeing. He co-founded PUSHapp to make consistent, measurable training simple for everyone.