Variations & Types
Grasshopper Pushups: Step-by-Step Guide
Master grasshopper pushups with step-by-step technique, muscles involved, breathing cues, common mistakes, and beginner-friendly modifications.
Grasshopper pushups: Technique and step-by-step execution
Starting position and setup
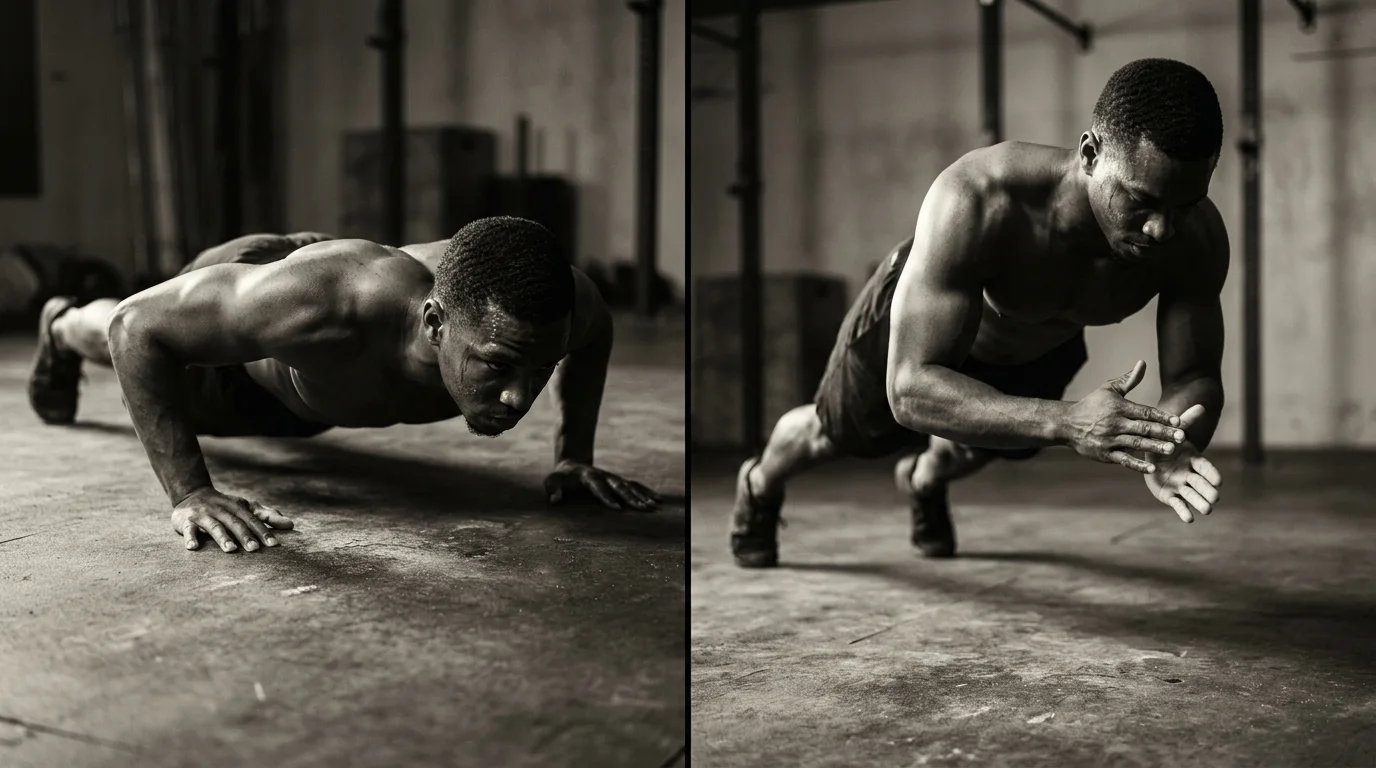
- Start in a solid push-up stance: hands under shoulders, feet hip-width, core tight, spine neutral.
- Grasshopper push up form: as you descend, draw the knee of one leg toward the same-side elbow; hips stay level. For beginners, use the knee-supported variant and keep the same knee-elbow cue.
Phases of the movement and tempo
- Descend for about 3 seconds, press back up for 3 seconds, switching sides after each rep; brief reset at the top.
Breathing cues and timing
- Inhale on the way down, exhale as you push back to start.
Common mistakes and corrective cues
- Hips sag: brace abs and glutes; keep hips in line.
- Elbows flare: tuck elbows to about 45 degrees.
- Knee drifts away from elbow: actively guide knee toward elbow.
- Incomplete ROM: ensure knee meets elbow at the bottom.
Progression and regression with rep targets
- Regression (knee-supported): 6–8 reps per side, 2–3 sets.
- Progress to 8–12 reps per side, 2–4 sets; then attempt full grasshopper push-ups for 6–10 reps per side.
Muscles engaged and alignment: reading the grasshopper pushups muscle map
Primary muscle groups targeted
- Grasshopper pushups muscles include the chest and front shoulders (pectoralis major and anterior deltoids) with the triceps assisting.
- The grasshopper push-up muscles also rely on the core and hips to stabilize the spine as you coordinate the leg movement.
Core, hips, and spinal alignment cues
- Brace the core with a stable rib-to-pelvis connection; keep a neutral spine.
- Engage the glutes and deep hip stabilizers to keep hips level and prevent sagging.
- For grasshopper push ups form and alignment, aim for a straight line from head to heels and keep shoulders stacked over wrists.
Interpreting visual muscle maps (front and side views)
- Use visual muscle maps front view side view to guide checks: front view for symmetry in shoulders, hips, and knees; side view for a neutral spine and stacked joints.
- Look for a stable torso, minimal rib flare, and controlled leg positioning as you move.
Modifications, variations, and comparisons to related calisthenics
Beginner and knee-supported options
- Grasshopper push-up modification, knee-supported: from a knee-supported push-up stance (knees on a pad, hands under shoulders), perform the push-up with a small leg draw toward the same-side elbow. Keep your core braced and hips square. Aim for 3 sets of 6-8 reps per side; increase ROM as control improves.
- Grasshopper push ups for beginners knee-supported: if the leg motion is too hard, start on an incline (hands on a bench) and progress to a full floor version.
Surface, equipment, and progression considerations
- Surface: use a non-slip mat or padded floor; a bench or box can reduce load when starting.
- Equipment: minimal; parallettes or push-up bars can help wrists.
- Progression: knee-supported → floor; add tempo, longer holds at the bottom, and finally a full grasshopper with rotation.
Variations and how grasshopper compares to Spiderman push-ups and related moves
- Grasshopper push-ups variations vs Spiderman push-ups: both use leg movement, but grasshopper emphasizes a torso twist; Spiderman drives the knee to the elbow with less torso rotation.
- Related moves: Hindu push-ups and push-up rotations offer alternative paths to core and shoulder work.
Frequently asked questions
How do you perform a grasshopper push-up?
Start in a push-up stance with hips squared and core braced. As you descend, draw the knee of one leg toward the same-side elbow while keeping hips level; beginners can use the knee-supported variant. Lower for about 3 seconds, press up for 3 seconds, switching sides; breathe in on the way down and out on the way up.
Which muscles does the grasshopper push-up target?
Primary targets are the chest and front shoulders (pectoralis major and anterior deltoids) with the triceps assisting; the core and hips also work to stabilize the spine during the leg movement.
What are common mistakes in grasshopper push-ups?
Common mistakes include hips sagging, elbows flaring, knee drifting away from the elbow, and incomplete range of motion. Fixes: brace the core and glutes to keep hips level, tuck elbows to about 45 degrees, actively guide the knee toward the elbow, and ensure the knee meets the elbow at the bottom.
How can I modify grasshopper push-ups for beginners?
Begin with knee-supported (or incline) options to build trust in the pattern. Use the targets: knee-supported 6–8 reps per side, 2–3 sets; progress to 8–12 reps per side, 2–4 sets, then attempt full grasshopper push-ups for 6–10 reps per side.
About the authors

Goran Huskić
Co-founder · Professional basketball player
Goran Huskić is a Serbian professional basketball player — a 6'11" center currently playing for Monbus Obradoiro in Spain's Primera FEB. He won the 2019–20 Basketball Champions League with San Pablo Burgos and has competed professionally across Spain, Germany, Lithuania, Serbia and the United States. He co-founded PUSHapp to bring pro-level training discipline to everyday workouts.

Nikola Janković
Co-founder · Former professional basketball player
Nikola Janković is a former professional basketball player — a 6'9" forward and the 2016–17 ABA League MVP — who played for Partizan, Union Olimpija and Mega, among others. Today he runs a pilates studio and gym focused on strength, mobility and overall wellbeing. He co-founded PUSHapp to make consistent, measurable training simple for everyone.